
Chapter 9: Using the Assembler, QEMU, & GDB
Now that you understand some basic instructions, we can go over how to write a Source File, Assemble it, and then Debug it. That way, if desired, you can test out various examples/pictures that I've provided in this PowerPC Tutorial. You should have all the software installed from Chapter 2. This will be a hefty chapter, so take your time.
So the concept of what are doing is we first write out a Source File (Program) that contains our Assembly Instructions. We then use the Assembler to assemble it to a make an Executable file. Afterwards, we launch the Executable using QEMU (our emulation software). Finally we launch the GNU Debugger (GDB) that will allow us to debug the running Executable.
Overview:
Source File -> Assembler -> QEMU -> GDB
For writing Source Files, you can use any text editor. Doesn't really matter. Your Source File can only be one of the following two extension types, they are as follows...
example.s is a "pure" / "raw" Assembly Source File. In nooby terms, when the Assembler generates these raw files into an Executable, the Assembler will only add in what are known as "Elf" attributes and nothing else. These Elf Attributes are required so your Computer will know it's an Executable file. There are zero extra instructions/code that are added to the final executable file. Using this kind of Source File requires an extra step which is using the Linker after running the Assembler.
example.S, in nooby terms, is a type of Assembly file will allow you to include standard C/C++ functions and you won't be required to do basic "processor setup" (address translation, cache setup, etc). Regarding the C/C++ functions, this is helpful because there is zero need to write out monstrous amount of handwritten Assembly Code for basic certain tasks. If it exists in the standard C/C++ library, we can simply call it (more on function calls in Chapter 23).
To write a "raw" Assembly Source File, it needs to start with the following....
.section .text
.global _start
_start:
The above contents are Assembler Directives. You will learn more about Assembler Directives in Chapter 18. For now, just understand that Assembler Directives are NOT PowerPC instructions.
Regarding the first line, this Directive tells the Assembler that the section of contents below will be of PowerPC instructions.
Regarding the 2nd and 3rd lines, every .s (raw Assembly) file must have its starting code underneath the label of "_start:". You will learn more about labels in Chapter 11. The ".global _start" is needed so the Linker knows where the code for "_start:" exists at.
Simply put, you need those 3 lines above the start of your code or else the Assembler won't know how to Assemble your raw Source file. Knowing this, we can setup a basic example.s file to include some of the instructions that you've learned in the previous chapter. Open up your favorite text editor and make a file called example.s. Within example.s, place in the following contents..
.section .text
.global _start
_start:
nop
li r3, 1
li r4, 2
add r5, r3, r4 #Do 1 + 2.
Save and close the file. If you are wondering why the first PPC instruction is a nop, I will explain shorty. Now open up a terminal in the directory where example.S is located. Run the following command...
powerpc-linux-gnu-as -mregnames example.s -o example.o
The above will use the Assembler to create an object file. Now run this command...
powerpc-linux-gnu-ld example.o -o example
This above will use the Linker to make an executable file using recently made object file. Now we have a small program. To be able to debug it, you first need to launch it with QEMU (the emulation software).
qemu-ppc -g 1234 ./example
You will see that nothing happens when you enter in this command. It will stall.

QEMU is waiting on the GNU Debugger (GDB) to be launched. In a second terminal (while keeping the QEMU terminal running), run this command...
gdb-multiarch -q --nh \
-ex 'set architecture ppc' \
-ex 'file example' \
-ex 'target remote localhost:1234' \
-ex 'layout split' \
-ex 'layout regs'
Once you've entered the above terminal command, you will be at the first instruction of the Source File (nop).
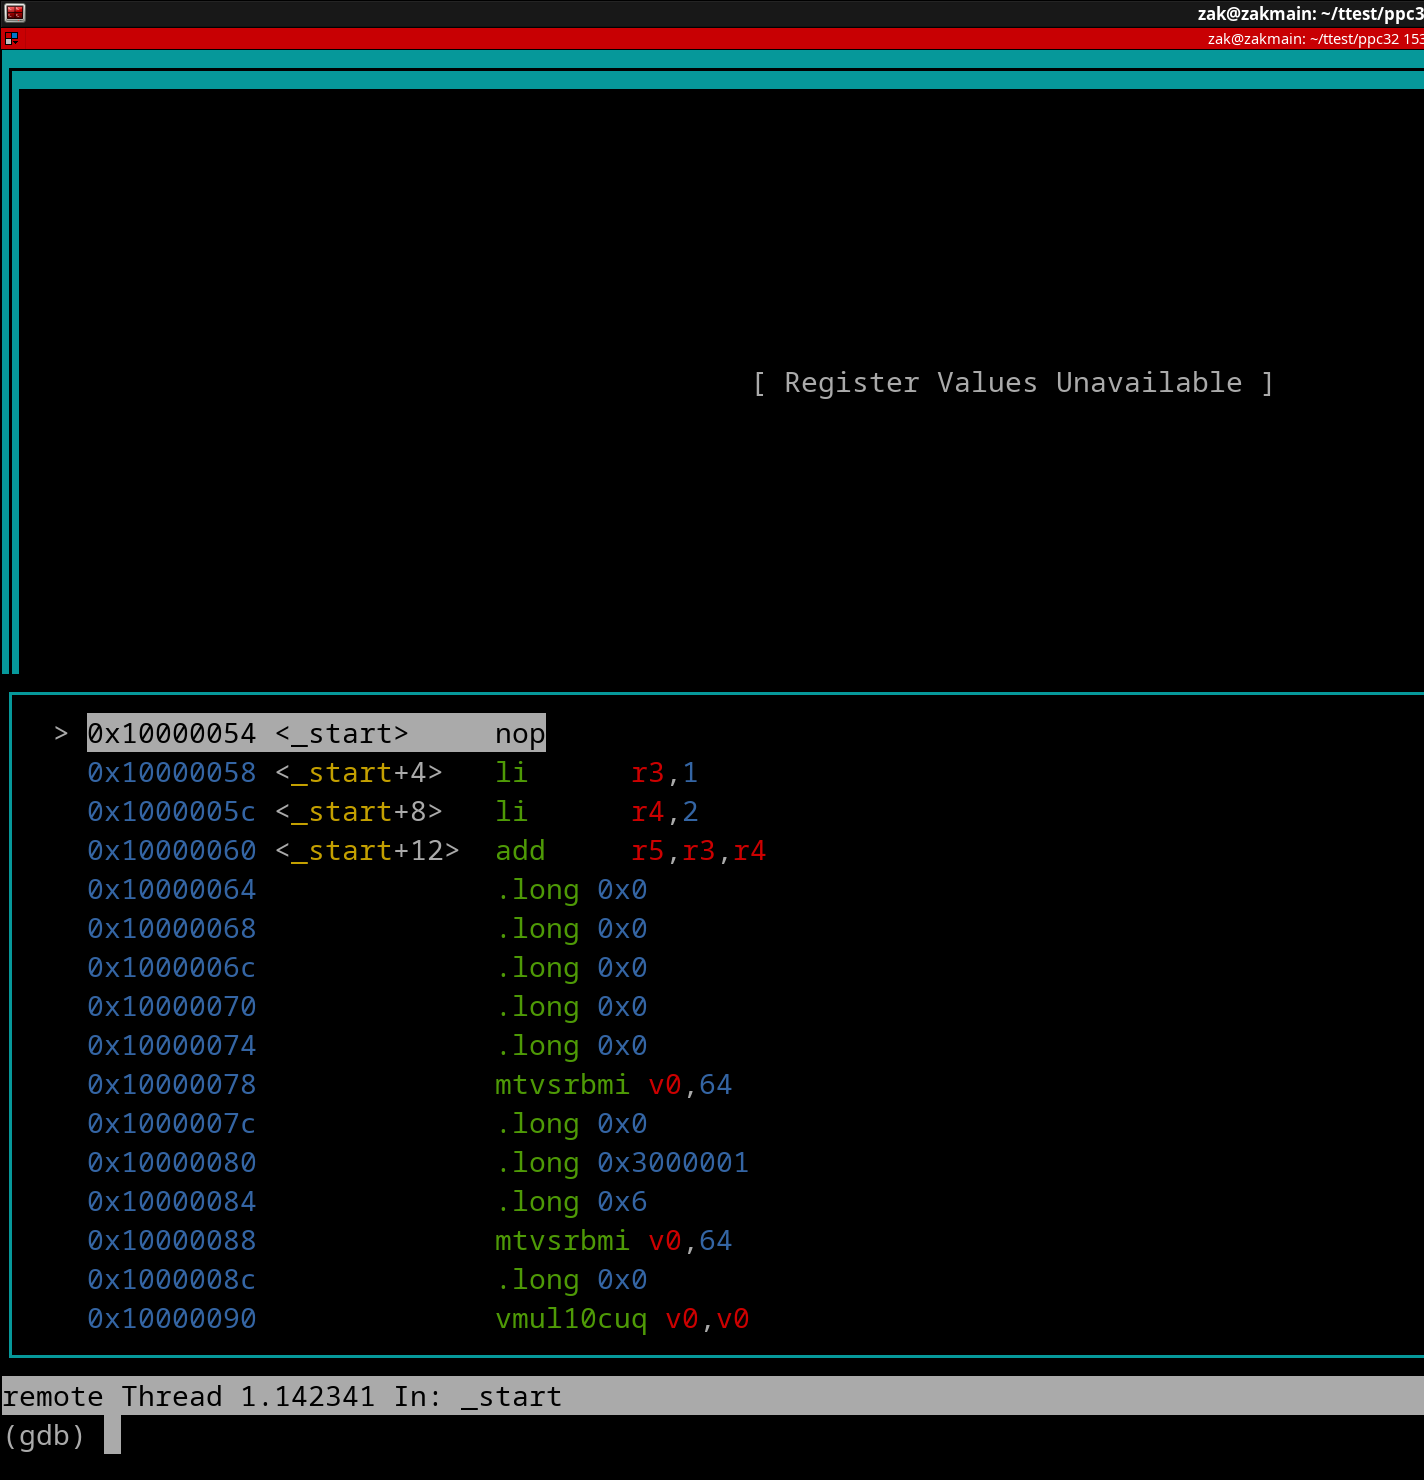
GDB may say that the Registers are unavailable. I have no idea why this oddity occurs as it should be available once GDB has launched.
Before continuing, let's cover some basic GDB Commands. These are commands you enter into the terminal in which you had used to launch GDB within...
stepi will be the most common GDB command that you will use. It will force QEMU to execute the program one instruction at a time. This is known as "stepping". Stepping is the best way to understand how certain instructions work. It's great for beginners.
Go ahead and do one stepi command. If the registers were not available, they will now be available. This is the reason why your example.s's first instruction was a nop.
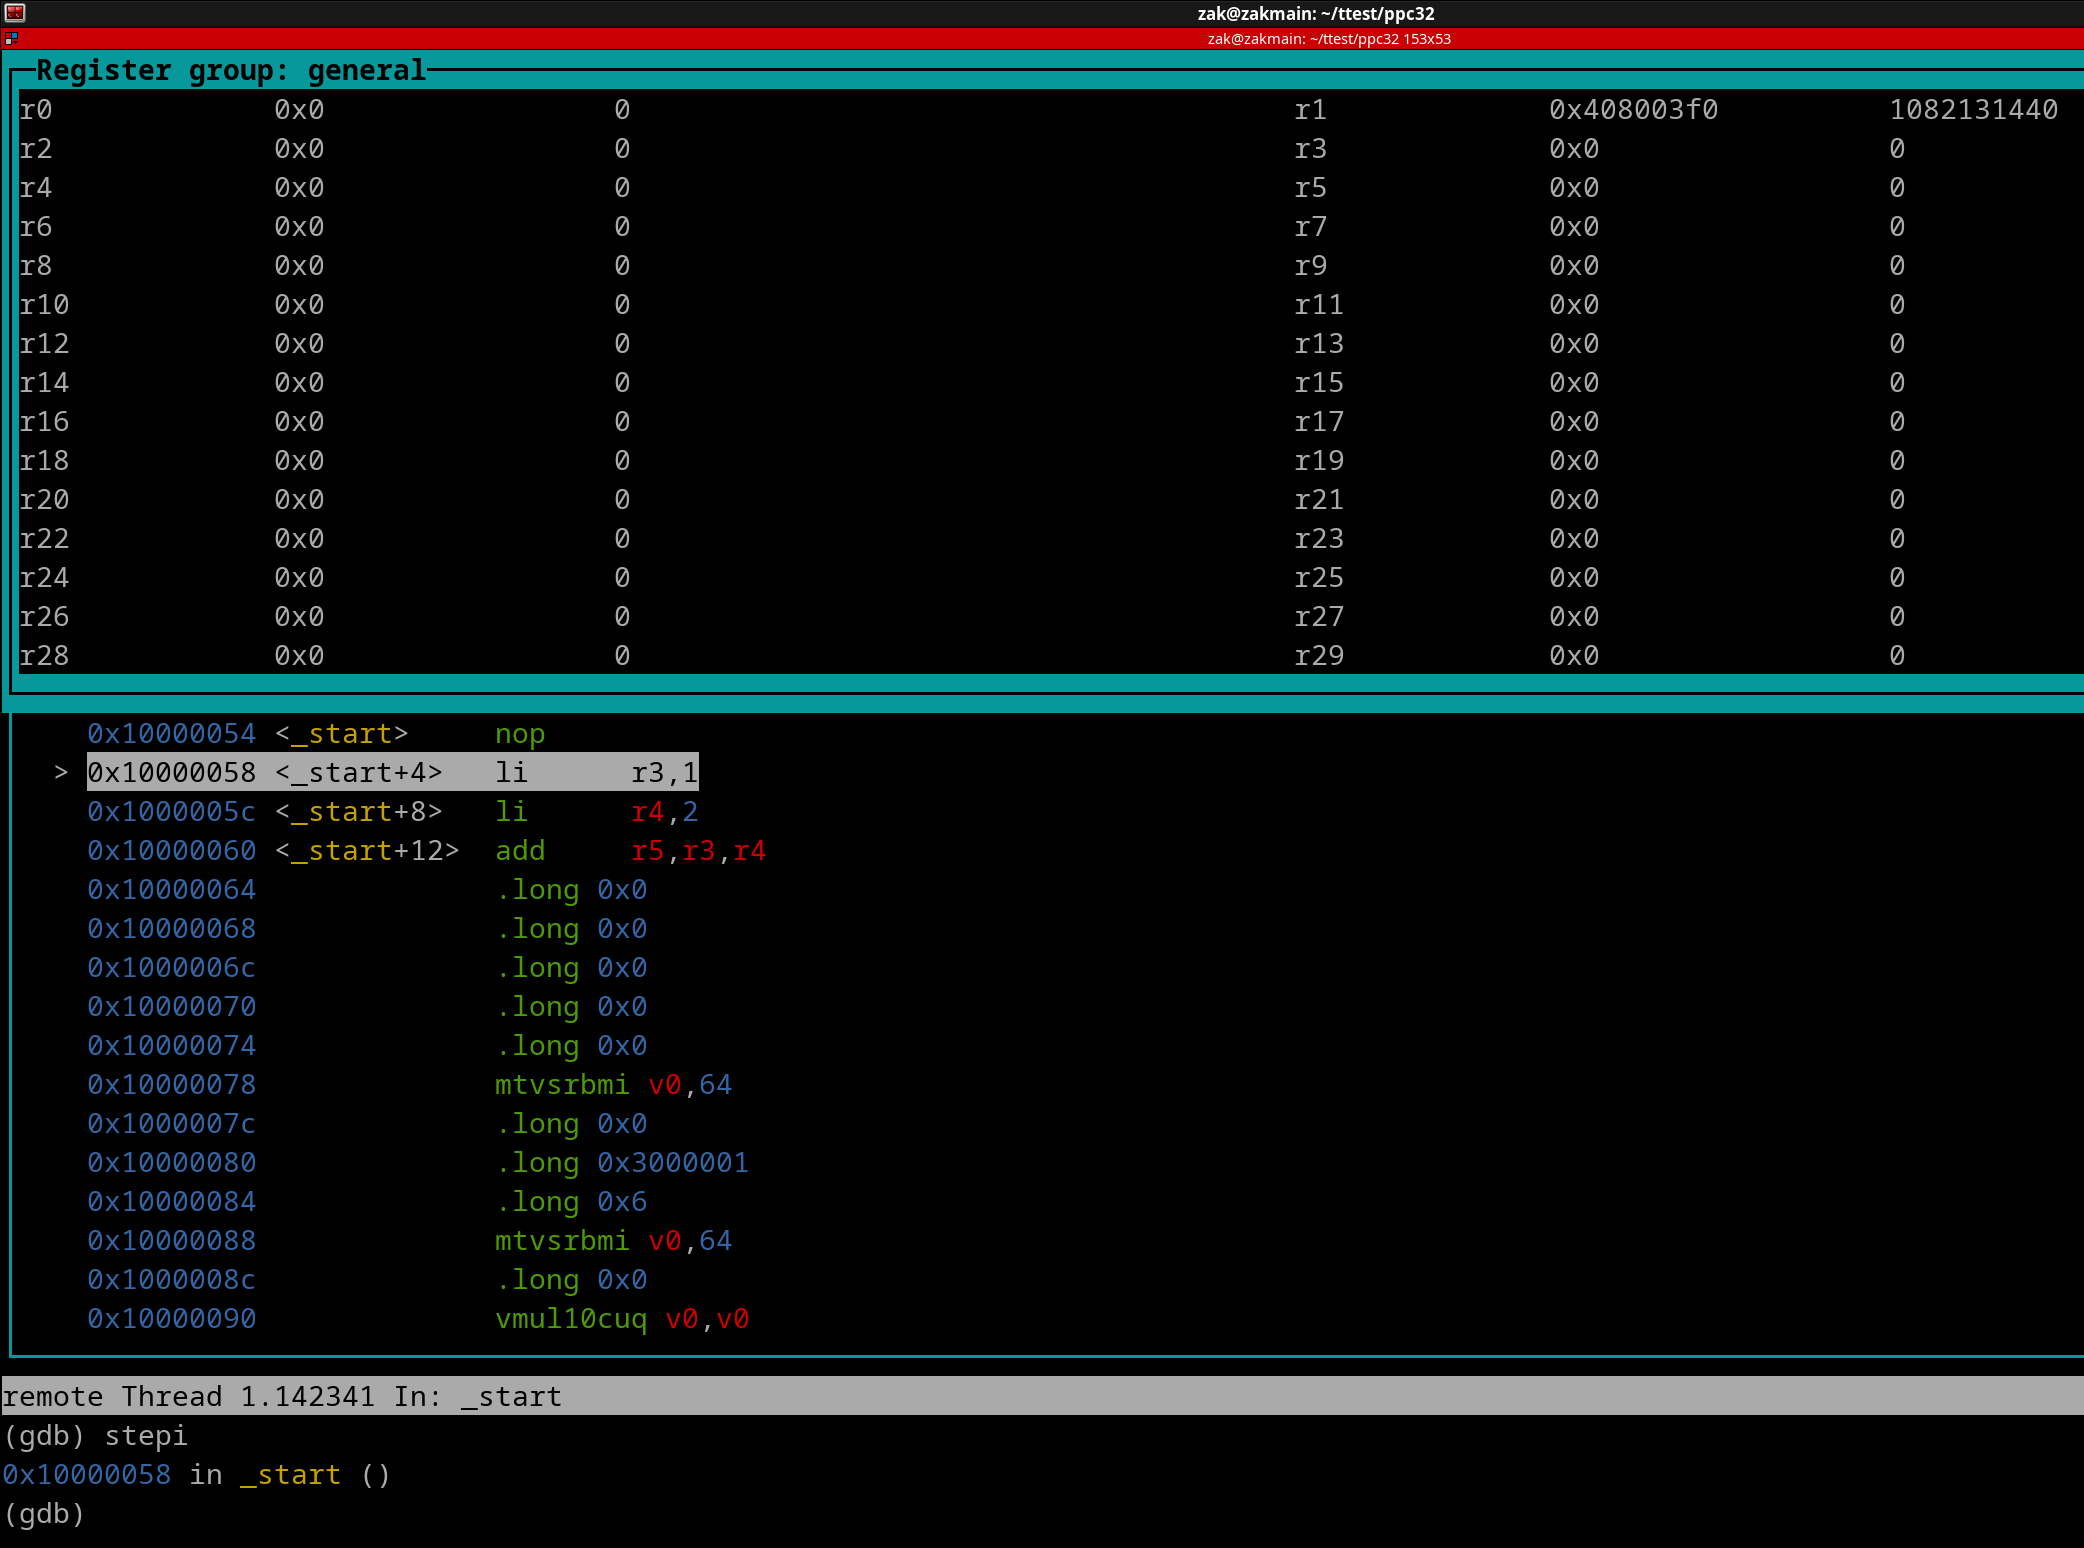
Now issue another stepi GDB command. You will see that r3 now contains the value of 1, since the first li instruction was executed.
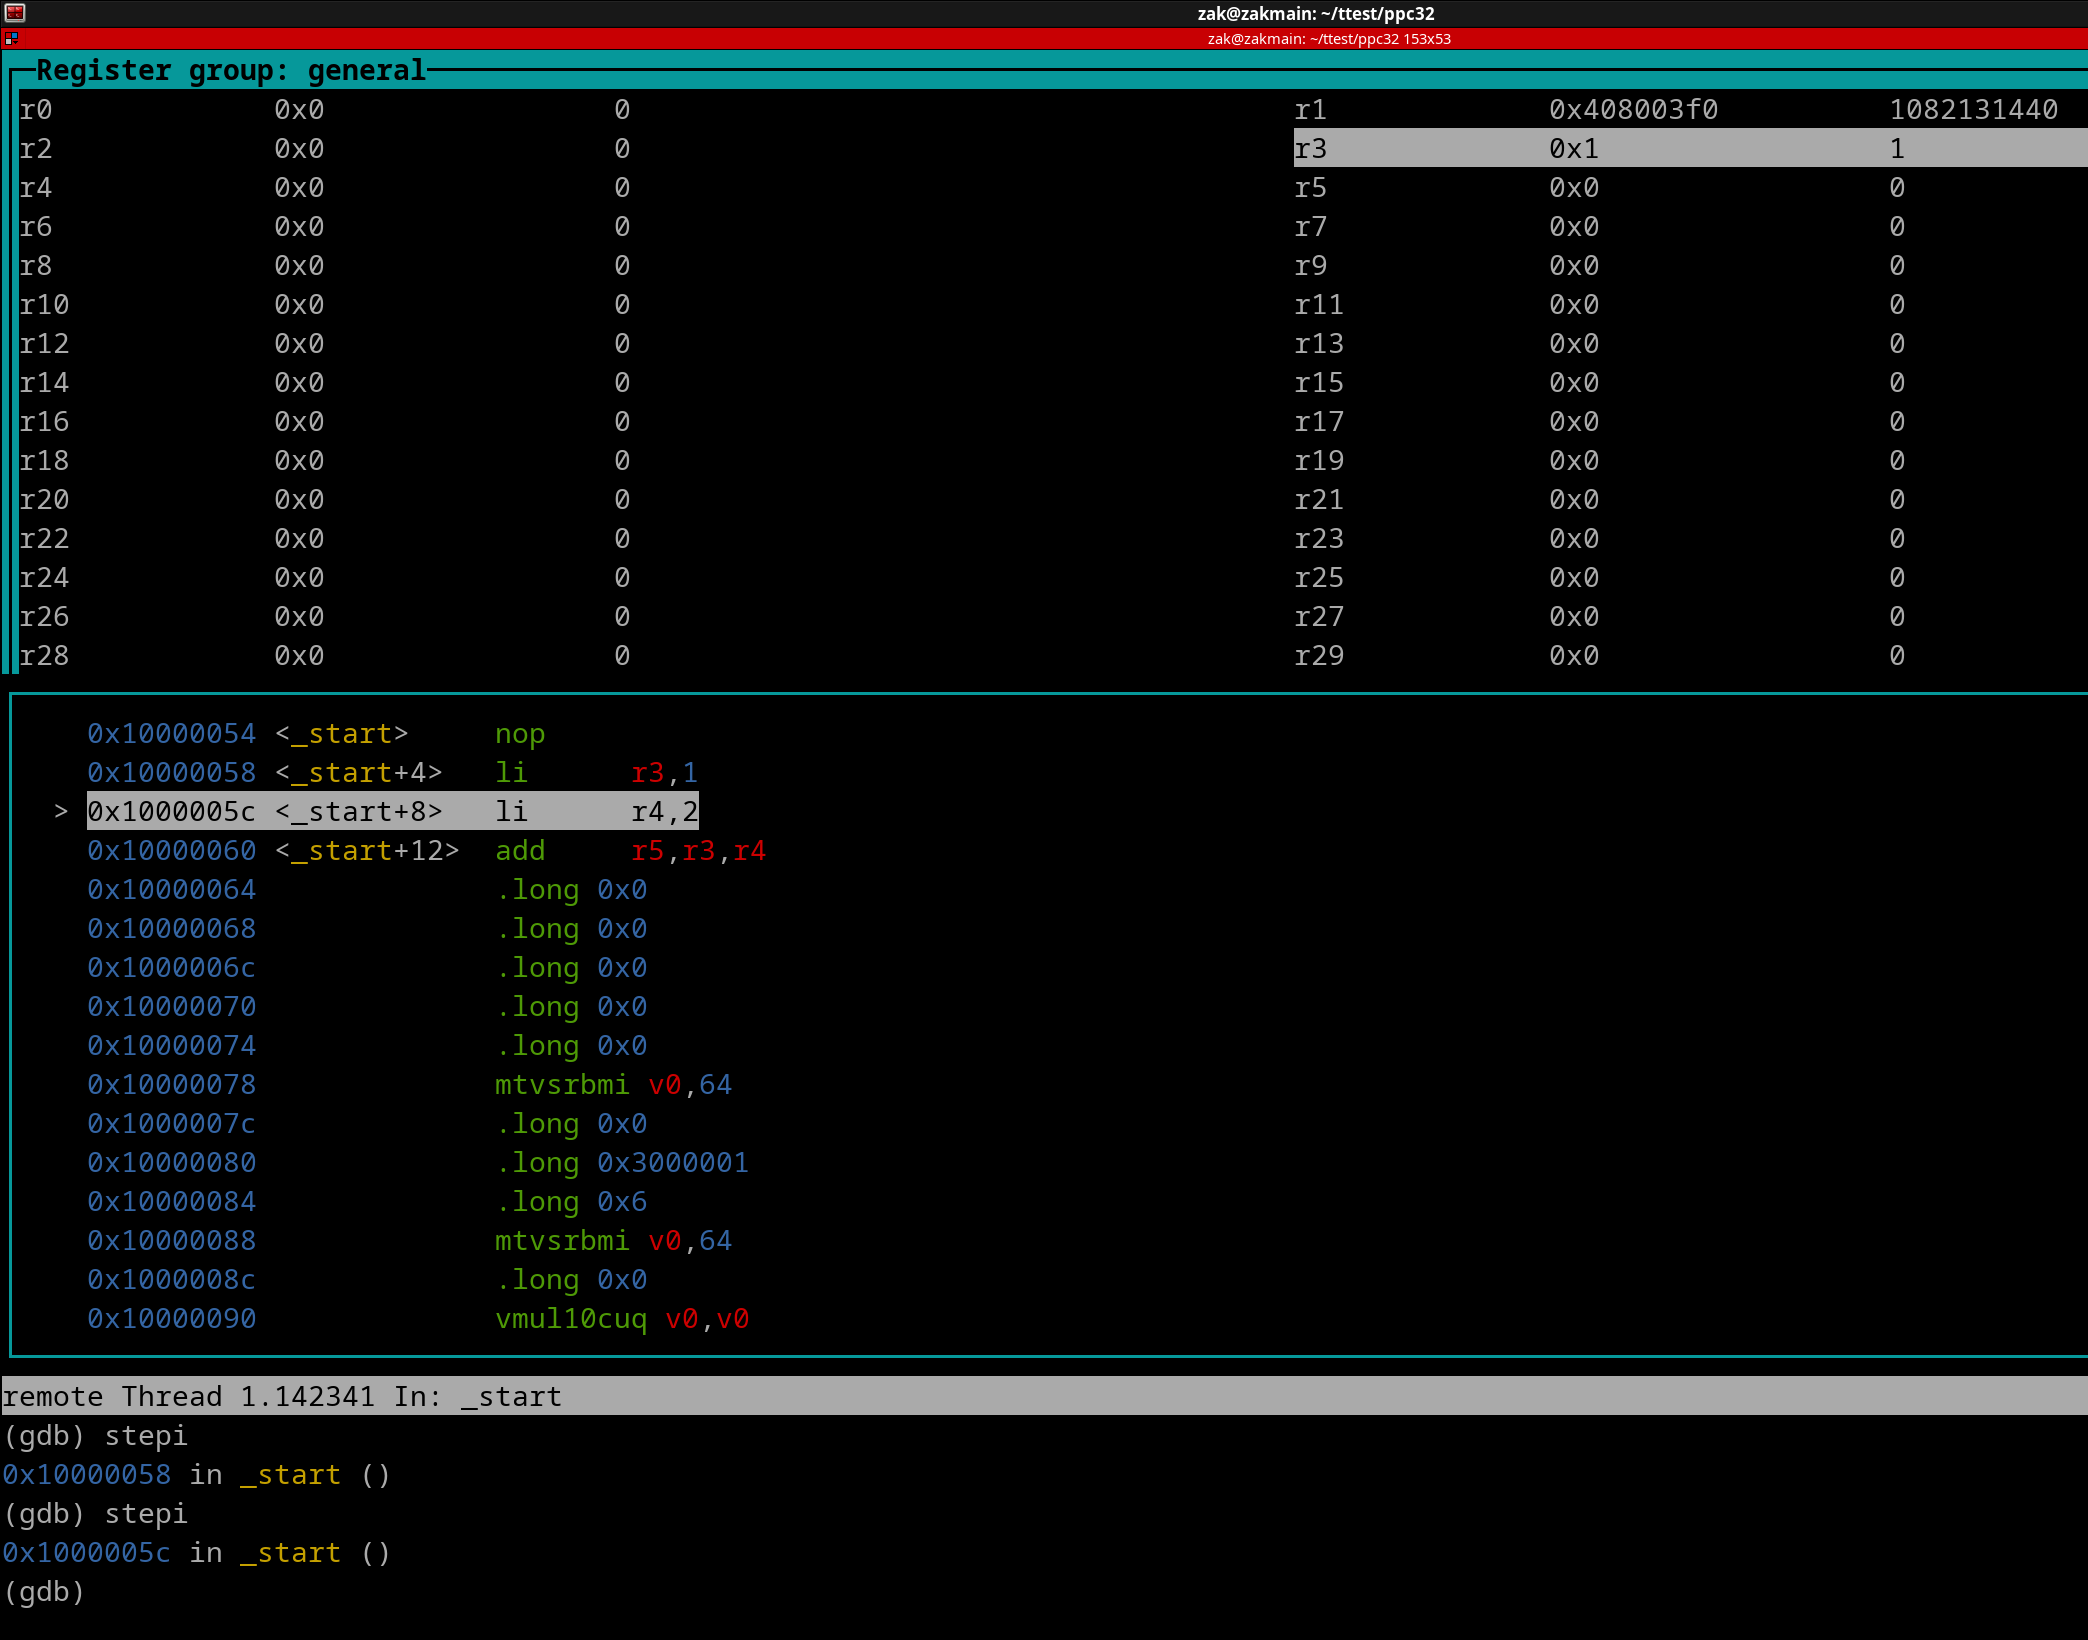
Useful TIP: If your next GDB command is the same as the previously entered GDB command, you can simply press Enter on your keyboard.
Now press enter to step thru the next li instruction. r4 should now equal 2.
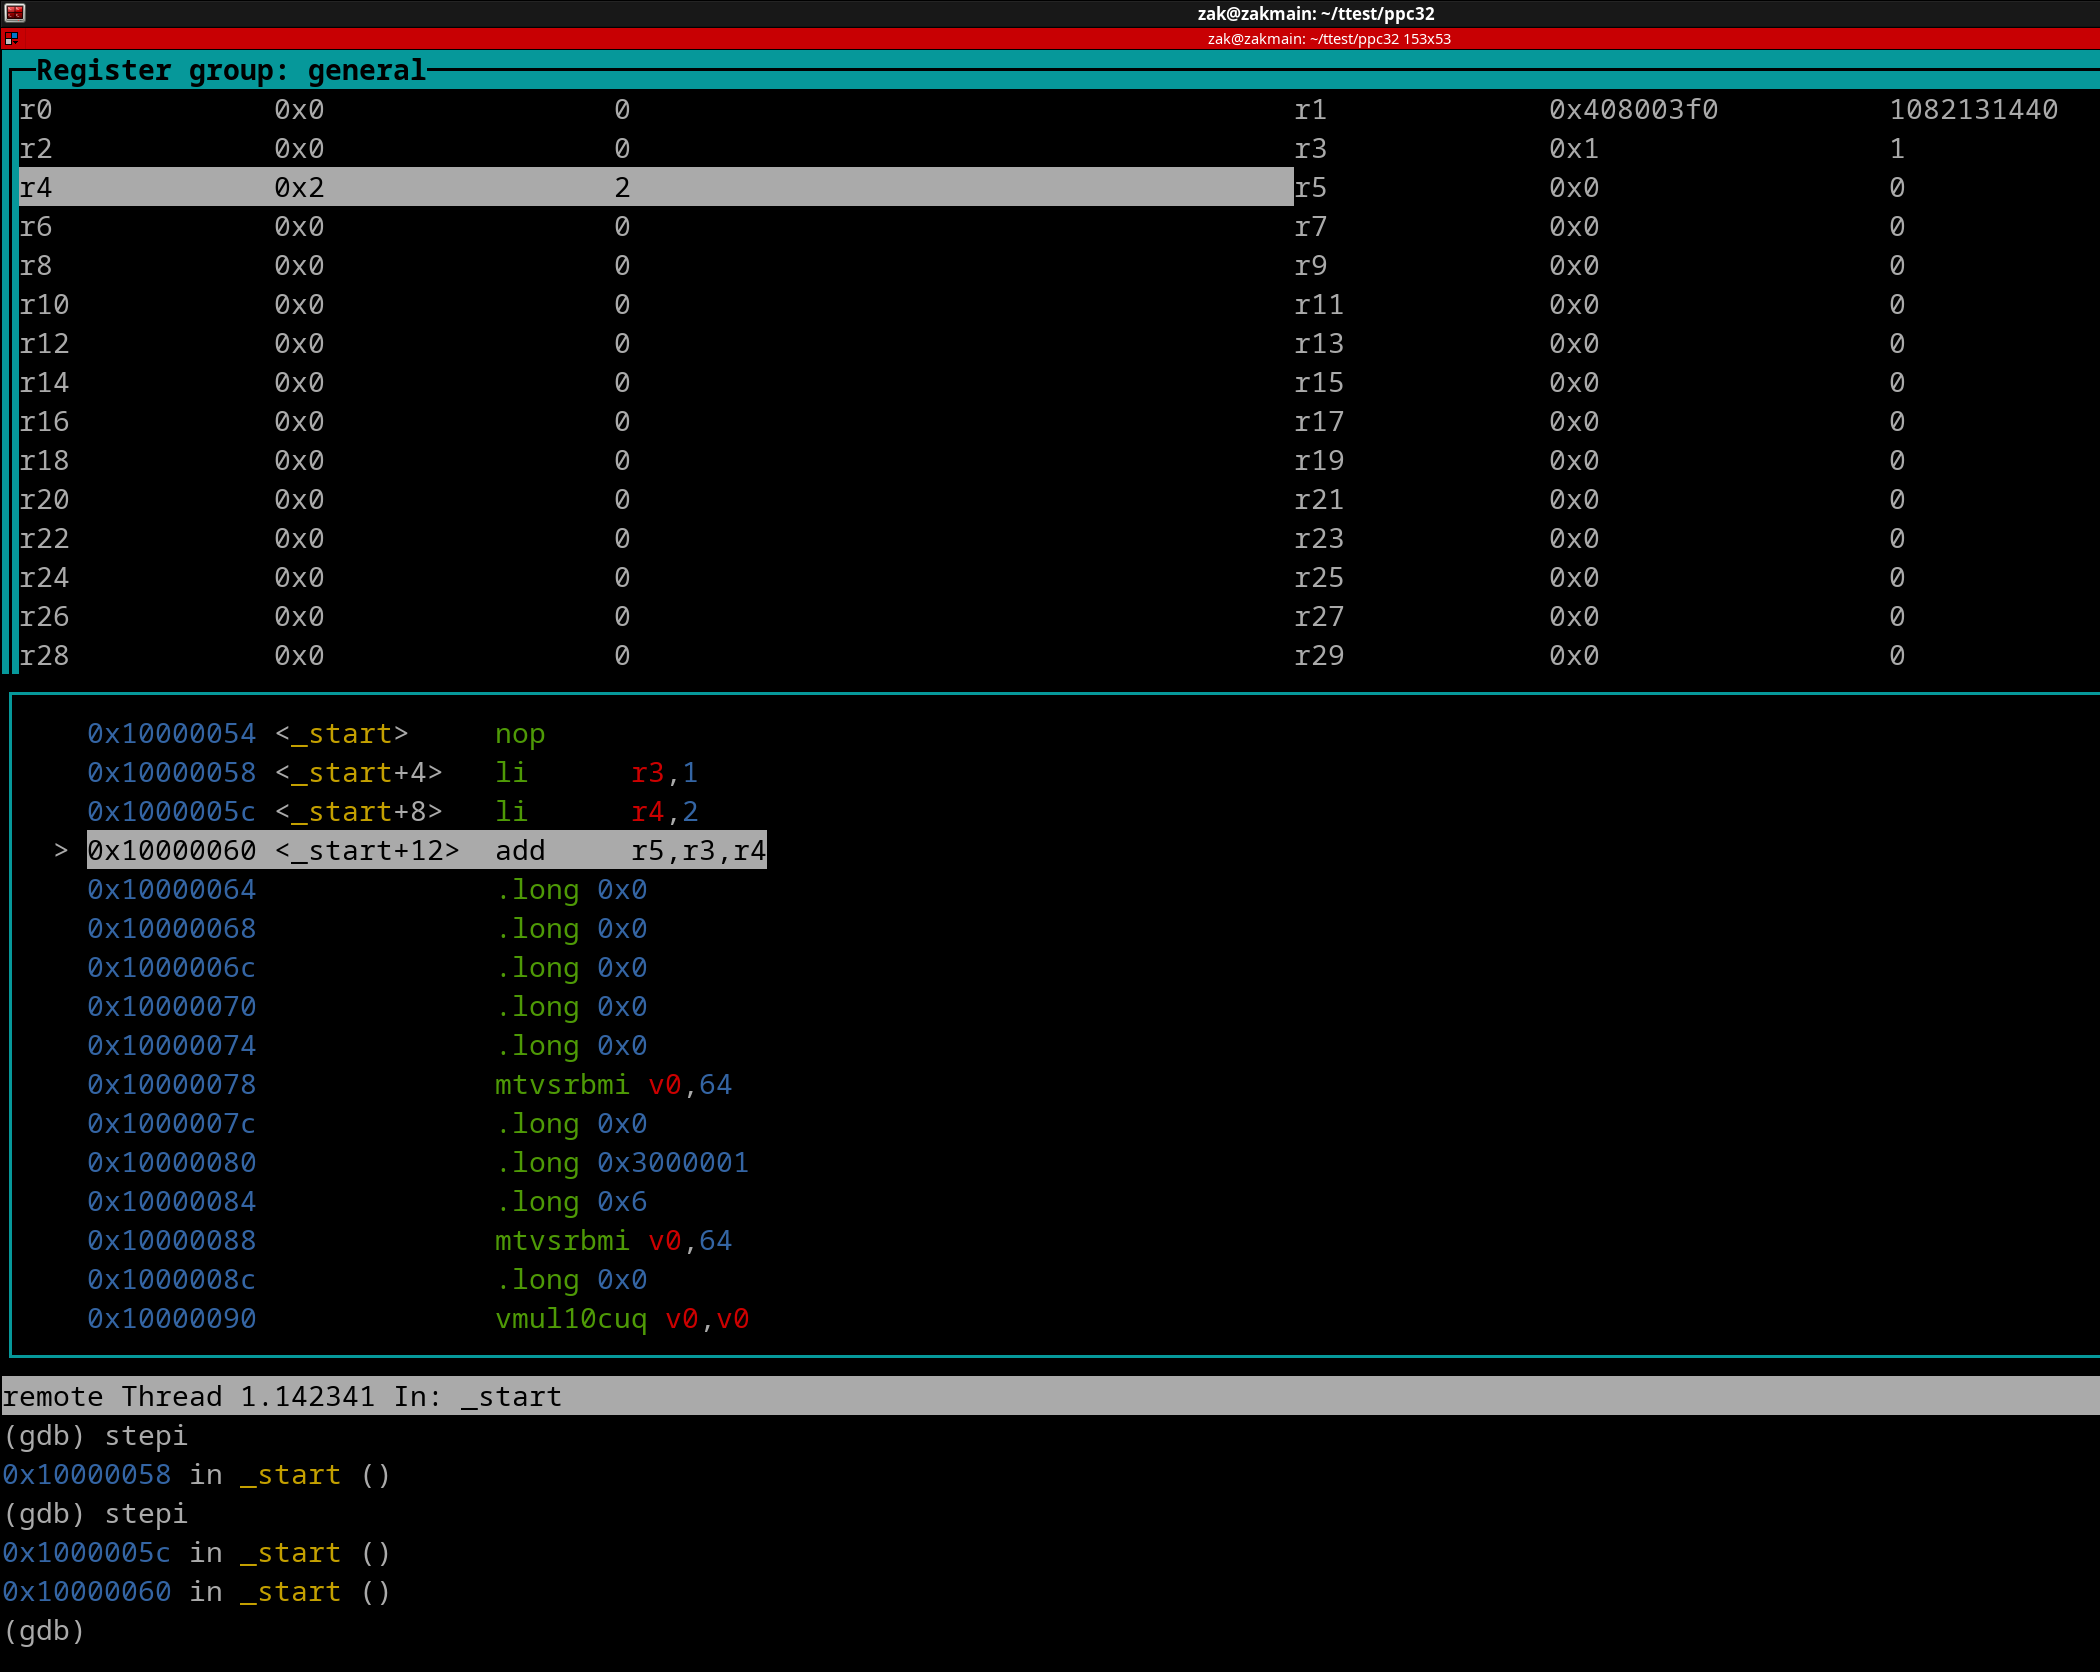
Press enter again. The add instruction will get executed. 1 + 2 = 3 ofc. r5 now equals 3.
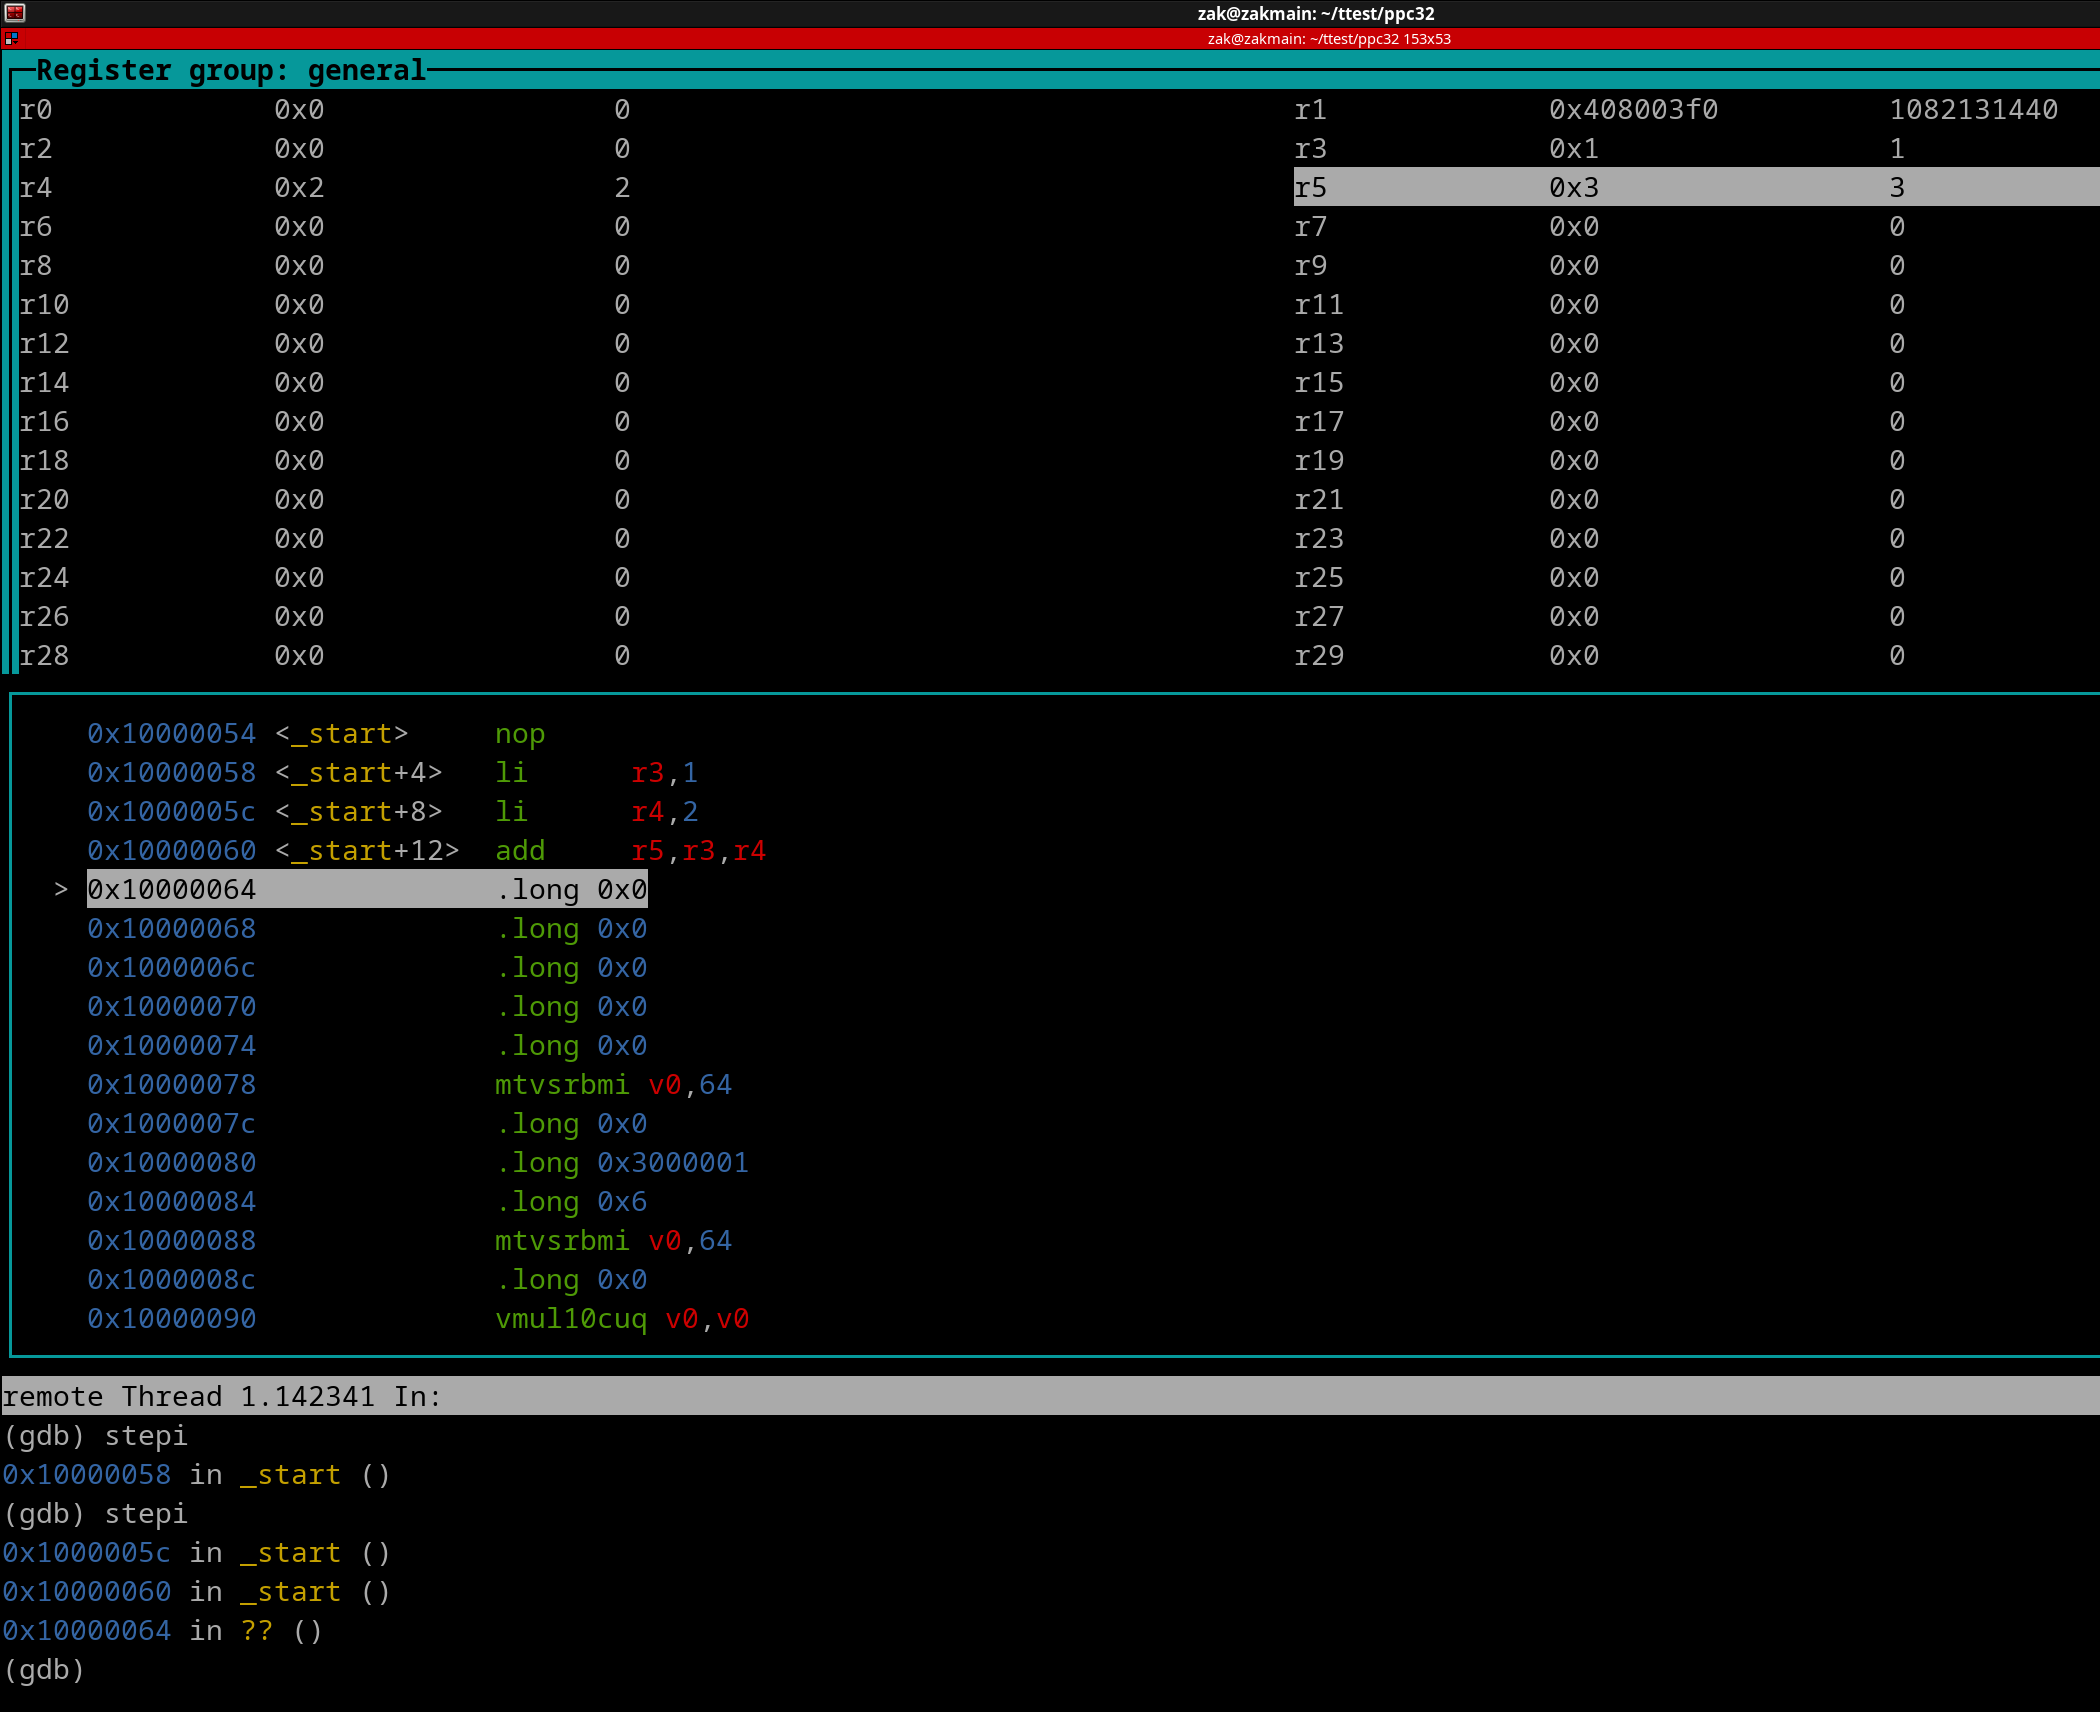
If you press enter yet again, you will incur a program fault since there's no more PPC instructions in our program. To quit GDB, issue a quit command. You will be asked if you to quit anyway.
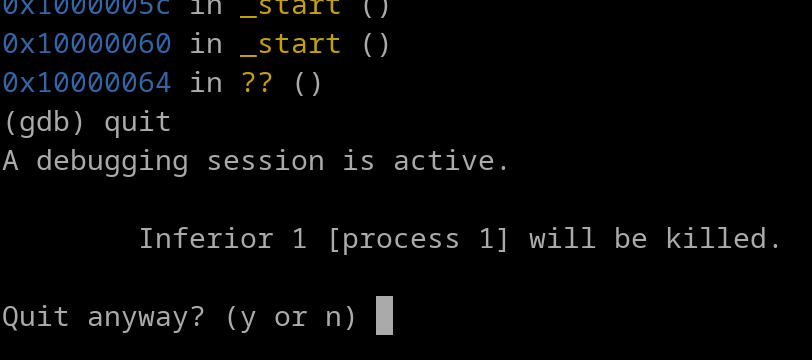
Enter y and GDB will close. If you look at the QEMU terminal, it will no longer be active.

So now you know how to write a basic Assembly program and step thru it. Feel free to write and assemble programs along the way to test out further instructions that you will learn about going forward.
Let's go over how to do a .S (capital S) Assembly file. This will allow us to include C/C++ functions to use. Make a new file called example2.S. And put in the following contents...
.section .text
.global main
main:
nop
li r3, 1
li r4, 2
add r5, r3, r4 #Do 1 + 2.
li r3, 0
blr
Save and close the file. You will notice that the instances of _start are replaced with main. This is mandatory. You will also notice there are two more instructions in our Source file. Why are they there?
I'll try to explain this as best as possible since you are still a very early Beginner and have zero idea of what functions are and how they operate. Essentially the "nop" ppc instruction is not the 1st instruction of the program (once its Assembled). There is other code that happens beforehand. This code will do important tasks such as setting up Memory Management, placing in C/C++ functions, configuring Cache, etc. You can think of it as a sort of initialization code. Once all that code is done, then our portion of the program will begin.
Our code itself is a function (more on functions in Chapter 23) with the name "main". Since it is a function (and a specific function), it must have r3 as the value of zero before ending. The function ends once the blr instruction gets executed.
Since you are currently using Source Files for learning new instructions, you really don't need the last 2 instructions. If omitted, there will be a program fault though.
Now to assemble example2.S, we don't use the Assembler. We will use the PowerPC C Compiler. This is needed to include the C/C++ standard functions. Run the following terminal command in the directory where example2.S is located..
powerpc-linux-gnu-gcc -mregnames -ggdb3 -o example2 -static example2.S
NOTE: The PPC C Compiler may output the following (or something similar)...
/usr/lib/gcc-cross/powerpc-linux-gnu/12/../../../../powerpc-linux-gnu/bin/ld: warning: /tmp/ccBZx4bN.o: missing .note.GNU-stack section implies executable stack
/usr/lib/gcc-cross/powerpc-linux-gnu/12/../../../../powerpc-linux-gnu/bin/ld: NOTE: This behaviour is deprecated and will be removed in a future version of the linker
This is not an error, just a warning. Your program will still compile correctly.
Alrighty, now launch QEMU, it will stall as expected.
qemu-ppc -g 1234 ./example2
Now launch GDB in a separate terminal. There are some modifications compared to the earlier GDB terminal command that you've used..
gdb-multiarch -q --nh \
-ex 'set architecture ppc' \
-ex 'file example2' \
-ex 'target remote localhost:1234' \
-ex 'break main' \
-ex continue \
-ex 'layout split' \
-ex 'layout regs'
The "-ex 'break main' \" GDB command will force GDB to allow the example2 executable to run until it hits our "main" function, which is the start of our Source File.

And there, now you can step thru the code as earlier.
Conclusion:
Use this guide in the future chapters to step thru any instructions that may confuse you.